*Video to be inserted here!
Campaign Details
Setting up the sending details for a campaign is an important step to take.
For each campaign, the following details are required:
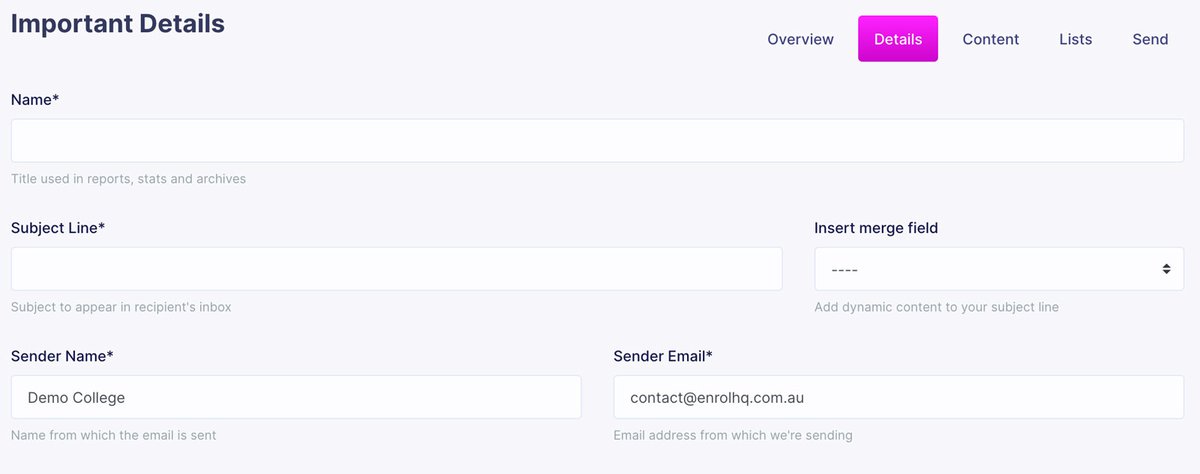
Title*
Title used in reports, stats and archives (internal reference only eg 190803 Campaign v2).
Subject Line*
Subject to appear in recipient's inbox
Sender Name*
Name from which the email is sent
Sender Email*
Email address from which we're sending
Body, Structure and Content
One of the biggest strengths of the Newsroom editor is that it provides school staff with tremendous design flexibility.
This is achieved by separating the concepts of Body (settings that apply to the entire message), Structures (rows of content in the message, which can be added, removed, copied, & moved) and Content (individual content blocks: images, text, buttons, etc., which also can be added, removed, copied, and moved).
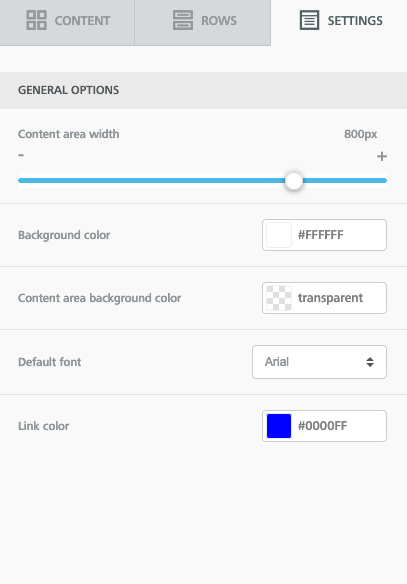
Body
General settings for the message.
They are inherited by Structure and Content blocks. For example, the font family set in the message settings is then used everywhere in your message, except where you use a custom setting.
This is very useful to build a coherent message very quickly.
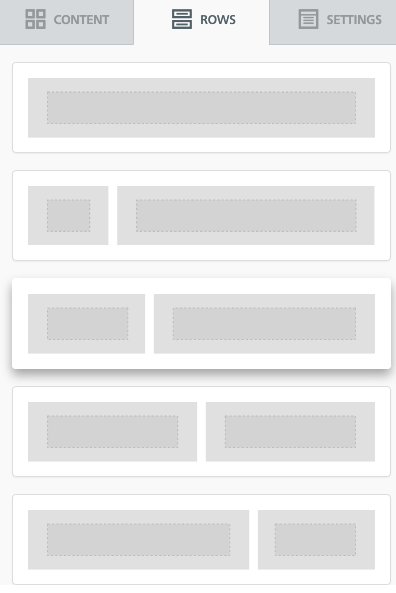
Structure
Here you can find different types of rows to insert into the message.
Rows are structural units that define the horizontal composition of a section of the message by using columns. You can use from one to four columns.
Using more than one column allows you to put different content elements side by side.
You can add to your messages all the structural elements you need, regardless of the template you selected when you started.
Every row has its own settings, which gives you the kind of flexibility that before was only achieved with hand-coded email.
For example, you can select a background colour for the entire row, only the message area, or a specific column within it.
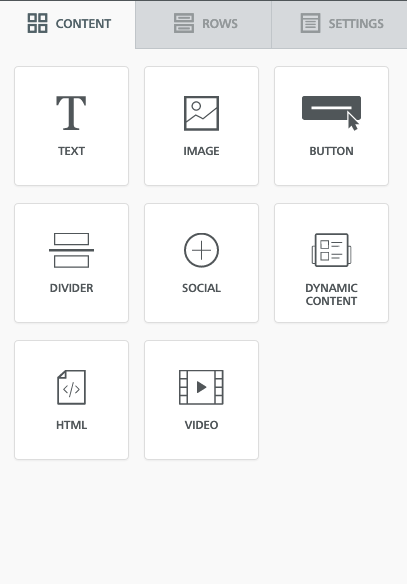
Content
This section includes a series of tiles that represent the different kinds of content you can use in your message.
To use them, just drag one inside a column, it will auto-adjust to the column width.
Every content block has it owns settings, such as granular control on padding. The right-side panel automatically switches to a property panel for the selected content element.
Editing Image Properties
When you insert an image onto the stage or click on an image that has already been added to the message, the properties area of the editor will show you a number of settings that you can configure and tools that you can use.
These include:
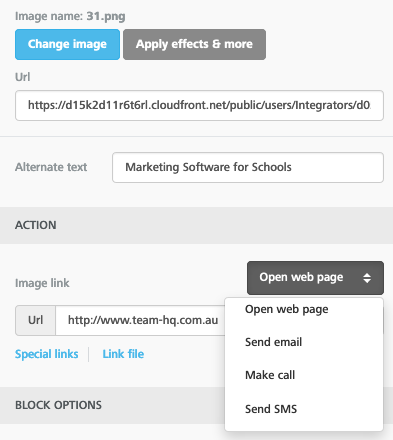
- Change image: click on this button to replace the image with a new one.
- Edit image: click on this button to load an image editing tool that allows you to resize the image, apply visual effects, and much more.
- URL: specifies where the image is saved. You can also paste an external URL to load an image from there.
- Dynamic: whether this is a dynamic image.
- Adjust to width: toggle this setting ON and OFF to automatically fill (ON) or not (OFF) the entire area of the message in which the image was placed.
- Align: change the positioning of the image.
- Alt text: enter the text that should be displayed when images are turned off. This is a best practice in email design since there are still email clients that have images turned off by default.
- Action: you may link the image to a URL, to a new message in an email client or to a telephone number for making a call or sending a text message. You can also link the image to a file that you previously uploaded through the editor’s file manager.